Web push notifications let your app reach users even when they don't have a browser tab open — no native app required. The Laravel Notification Channels project is a community collection of notification drivers for Laravel, and their Web Push Notifications Channel adds push notifications into Laravel's existing notification system, so you write a notification class the same way you would for mail or Slack. Under the hood, it talks directly to the browser's Push API using VAPID keys, with no third-party push service in between. Chrome, Firefox, Edge, and Safari are all supported.
安装
Pull in the package via Composer, then add the
HasPushSubscriptions
你的特质
User
model — this is what gives users their push subscription methods:
作曲家

要求

laravel-通知通道/webpush
使用
NotificationChannels\WebPush\HasPushSubscriptions
;班级
用户
延伸
模型{
使用
HasPushSubscriptions
;}The package needs a database table to store subscriptions, so publish and run its migration:
php

工匠

供应商:发布

--提供者=
"NotificationChannels\WebPush\WebPushServiceProvider"

--标签=
"migrations"php

工匠

迁移
Publish the config file if you need to customise anything:
php

工匠

供应商:发布

--提供者=
"NotificationChannels\WebPush\WebPushServiceProvider"

--标签=
“配置”
Finally, generate a VAPID key pair:
php

工匠

webpush:vapid
This adds
VAPID_PUBLIC_KEY
和
VAPID_PRIVATE_KEY
你的
.env
file. The public key gets shared with the browser when a user subscribes; the private key signs outgoing push messages so browsers can verify they came from you. Treat these like any other secret, and don't rotate them — every existing subscription is tied to the key pair that created it.
If you're targeting Safari or iOS, you'll also need to add a
VAPID_SUBJECT
— a URL or
mailto:
address that identifies your app. Apple requires it and will return a
BadJwtToken
error without it.
客户端设置
Web push requires two things in the browser: a service worker to receive and display notifications, and a call to
PushManager.subscribe()
to get the subscription object you'll save on the server.
笔记: The Push API only works in a secure context — your site must be served over HTTPS.
http://localhostis the one exception and works without TLS for local development.
Service Worker
创建一个
public/sw.js
file. The service worker runs in the background and handles incoming push events:
self.
添加事件监听器
(
'push'
,
功能
(
事件
){
让
数据
=
{};
尝试
{数据
=
event.data?.
json
()
??
{};}
抓住
(e) {数据
=
{ title:
'Notification'
, body: event.data?.
文本
()
??

“”
};}事件。
waitUntil
(self.registration.
显示通知
(data.title, {body: data.body,icon: data.icon,badge: data.badge,data: data.data,actions: data.actions,})(英文):});self.
添加事件监听器
(
'notificationclick'
,
功能
(
事件
){event.notification.
关闭
();
常量

网址

=
event.notification.data?.url
??

‘/’
;事件。
waitUntil
(self.clients.
matchAll
({ type:
'window'
, includeUncontrolled:
真的
})。
然后
(
功能
(
clientList
){
为了
(
常量

客户

的
clientList) {
如果
(client.url
===
网址
&&

'focus'

在
client) {
返回
client.
focus
();}}
返回
self.clients.
openWindow
(url);})(英文):});
这
notificationclick
handler checks whether a window is already open at the target URL and focuses it rather than opening a duplicate tab.
Subscribing
The VAPID public key needs to be available to your JavaScript. A simple way is a meta tag in your layout:
<
元

姓名
=
"vapid-public-key"

内容
=
"{{ config('webpush.vapid.public_key') }}"
>
Wire this up to a button click — browsers block the permission prompt unless it's triggered by a user gesture:
// VAPID keys are Base64URL-encoded; atob() requires standard Base64, so we convert first功能

urlBase64ToUint8Array
(
base64String
){
常量

padding

=

'='
。
重复
((
4

-
(base64String.
长度

%

4
))
%

4
(英文):
常量

base64

=
(base64String
+
padding).
代替
(
/-/
克
,
‘+’
)。
代替
(
/_/
克
,
‘/’
(英文):
常量

rawData

=

atob
(base64);
返回

Uint8Array
。
从
([
...
rawData].
地图
((
c
)
=>
c.
charCodeAt
(
0
)));}异步

功能

订阅
(){
如果
(
!
(
'serviceWorker'

在
navigator)
||

!
(
'PushManager'

在
window)) {
返回
;}
常量

允许

=

等待
Notification.
requestPermission
();
如果
(permission
!==

'granted'
){
返回
;}
等待
navigator.serviceWorker.
登记
(
'/sw.js'
(英文):
常量

登记

=

等待
navigator.serviceWorker.ready;
常量

contentEncoding

=
(PushManager.supportedContentEncodings
||
[
'aesgcm'
])[
0
];
常量

订阅

=

等待
registration.pushManager.
订阅
({userVisibleOnly:
真的
,applicationServerKey:
urlBase64ToUint8Array
(文档。
查询选择器
(
'meta[name="vapid-public-key"]'
).content),});
常量
{
端点
,
键
:{
p256dh
,
授權
} }
=
subscription.
toJSON
();
等待

拿来
(
'/push/subscribe'
,{方法:
'邮政'
,标题:{
‘内容类型’
:
‘应用程序/json’
,
'X-CSRF-TOKEN'
: document.
查询选择器
(
'meta[name="csrf-token"]'
).content,},body:
JSON
。
字符串化
({ endpoint, key: p256dh, token: auth, encoding: contentEncoding }),});}
navigator.serviceWorker.ready
is used rather than the registration returned by
register()
因为
register()
resolves as soon as the script is parsed, not when the worker is active.
ready
waits for an active worker before calling
pushManager.subscribe()
。
这
/push/subscribe
route on your server receives those four values and passes them to
updatePushSubscription()
on the authenticated user, covered in the next section.
Managing Subscriptions
On the server side, store what the browser just sent by calling
updatePushSubscription()
on the user:
$用户
->
updatePushSubscription
($endpoint, $key, $token, $contentEncoding);
You can also clean up when a user opts out:
$用户
->
deletePushSubscription
($endpoint);
One thing you don't have to manage manually is expired subscriptions. When a delivery attempt comes back with an expired endpoint, the package detects it and removes the subscription from the database automatically.
Sending a Notification
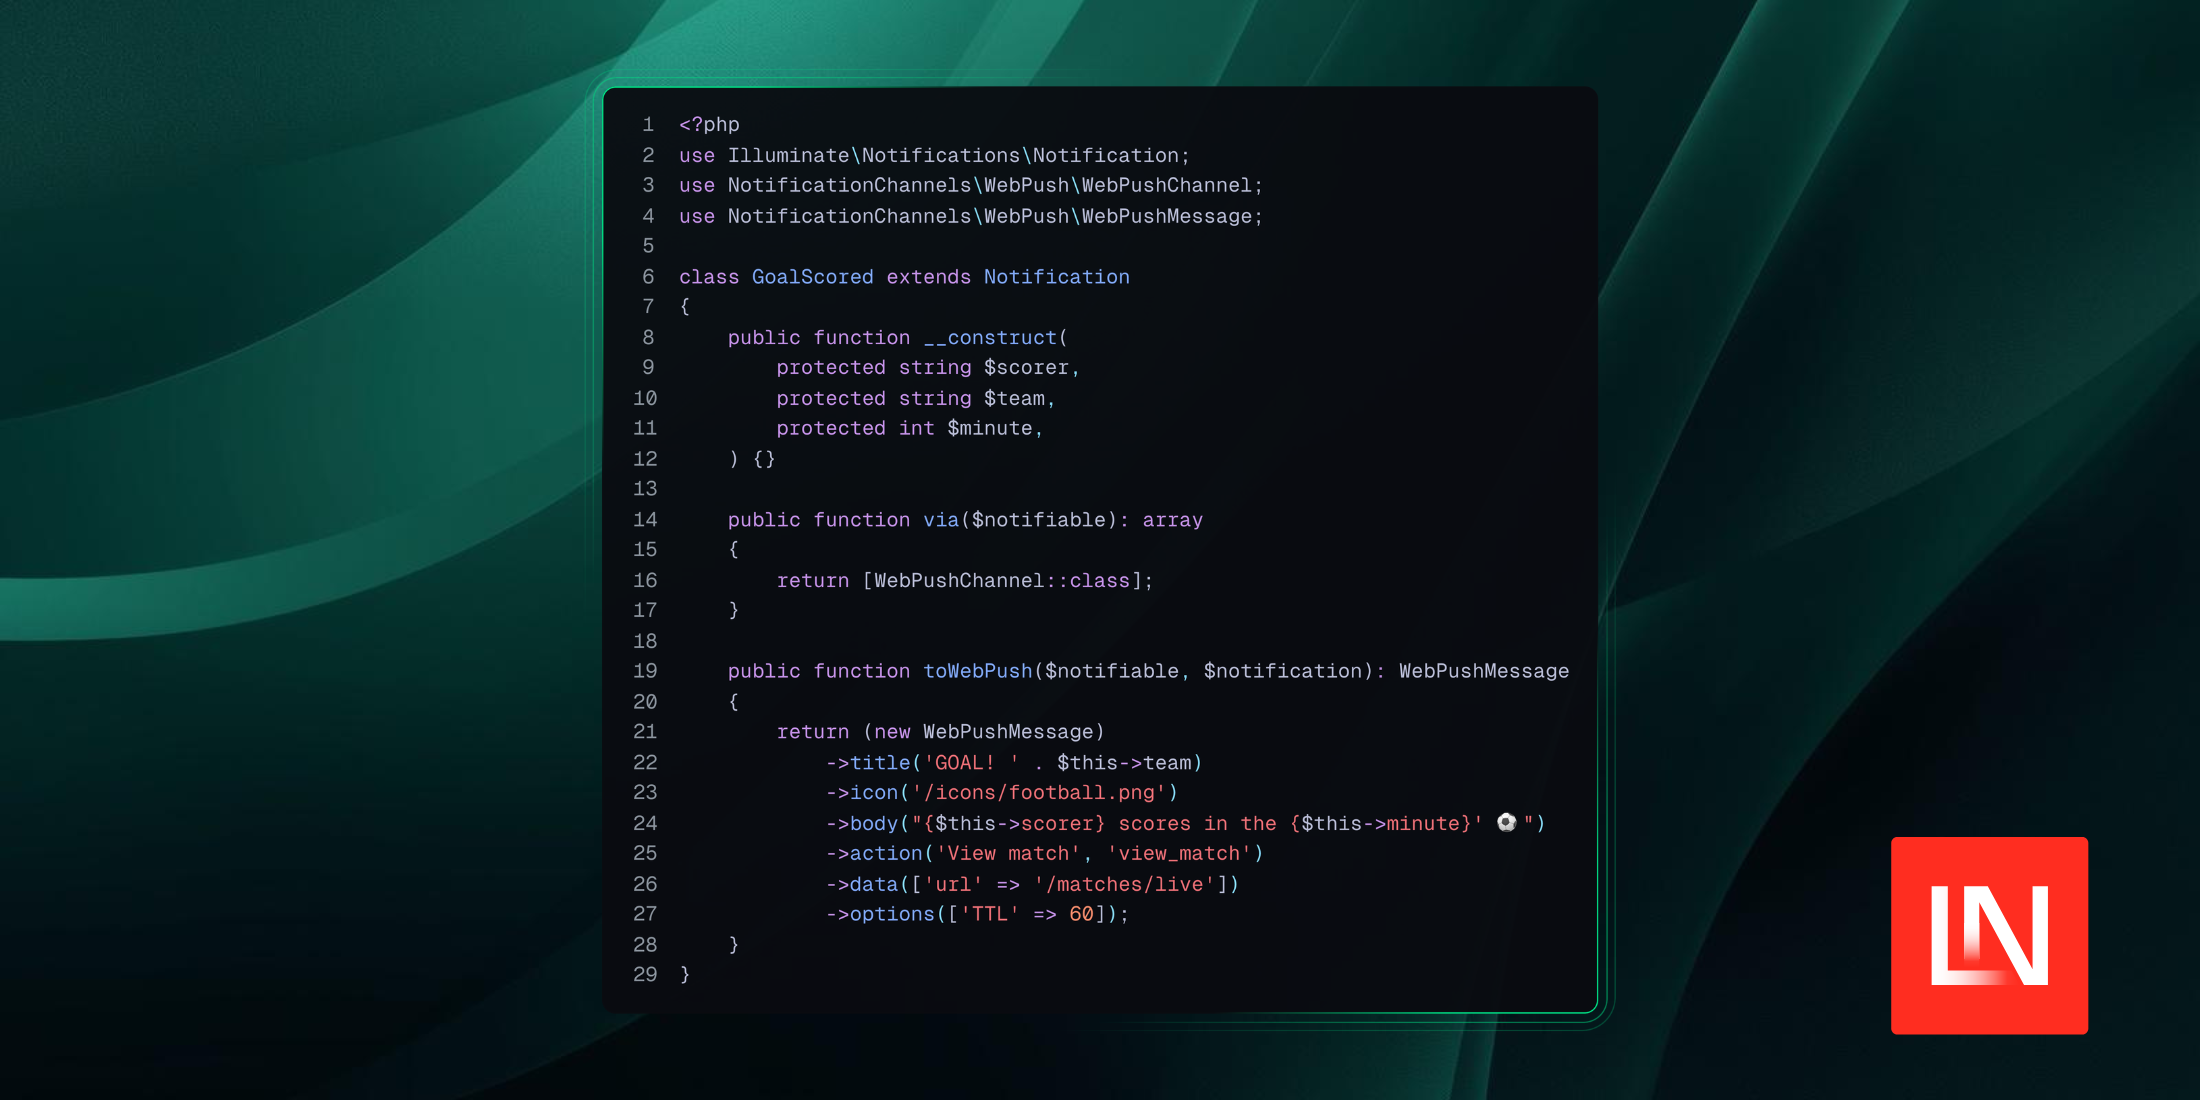
Once subscriptions are in place, sending a push notification is the same as any other Laravel notification. Add
WebPushChannel
到
via()
method and implement
toWebPush()
:
使用

照亮\通知\通知
;使用

NotificationChannels\WebPush\WebPushChannel
;使用

NotificationChannels\WebPush\WebPushMessage
;班级

GoalScored

延伸

通知{
民众

功能

__构造
(
受保护

细绳
$scorer,
受保护

细绳
团队,
受保护

整数
$minute,){}
民众

功能

通过
(需通知的)
:

大批{
返回
[
WebPushChannel
::班级
];}
民众

功能

toWebPush
($notifiable, $notification)
:

WebPushMessage{
返回
(
新的

WebPushMessage
)
->
标题
(
'GOAL! '

。

$this
->
team)
->
图标
(
'/icons/football.png'
)
->
身体
(
"{
$this
->
scorer
} scores in the {
$this
->
分钟
}' ⚽"
)
->
行动
(
'View match'
,
'view_match'
)
->
数据
([
'url'

=>

'/matches/live'
])
->
选项
([
'TTL'

=>

60
]);}}
A short TTL makes sense for a goal alert — a notification that arrives an hour later isn't useful.
WebPushMessage
covers the full Push API surface: alongside
title
,
body
,
icon
, 和
action
,你可以设置
badge
,
image
,
tag
,
vibrate
,
requireInteraction
, 和更多。
To send it, call
notify()
on the user as you would with any other Laravel notification:
$用户
->
通知
(
新的

GoalScored
(
scorer
:
埃里克·巴恩斯
,
团队
:
'Laravel News FC'
,
分钟
:
29
));Declarative Web Push
A newer alternative is
DeclarativeWebPushMessage
, which targets the
Declarative Web Push
spec. The main motivation is that traditional web push requires a service worker to be running to handle the push event — declarative push moves that logic to the browser itself, which has privacy and battery-life benefits on mobile. Browser support is still limited, but the API mirrors
WebPushMessage
closely:
使用

NotificationChannels\WebPush\DeclarativeWebPushMessage
;使用

NotificationChannels\WebPush\WebPushChannel
;民众

功能

toWebPush
($notifiable, $notification)
:

DeclarativeWebPushMessage{
返回
(
新的

DeclarativeWebPushMessage
)
->
标题
(
'GOAL! '

。

$this
->
team)
->
图标
(
'/icons/football.png'
)
->
身体
(
"{
$this
->
scorer
} scores in the {
$this
->
分钟
}' ⚽"
)
->
行动
(
'View match'
,
'view_match'
,
'https://myapp.com/matches/live'
)
->
navigate
(
'https://myapp.com/matches/live'
(英文):}
The key difference is
navigate()
, which tells the browser where to send the user when they tap the notification — no service worker
notificationclick
handler needed. Actions also accept a URL as a third argument for the same reason.
You can view the source code and learn more about the Web Push Notifications channel on GitHub 。